How to get consistent readership
Let’s start off by defining “consistent readership”. Consistent readership means that your blog post generates both ongoing and stable—maybe even increasing—interest over time. When a post doesn’t get consistent readership, traffic coming to it might look like this:
Traffic to a post according to Google Analytics

Top pages report for pcgamer.com
 Keep that list of ideas close, because we’re going to filter them so that only the contenders with the most potential remain.
Recap: you want to write about things that people are searching for month after month in order to drive long‐term traffic to your website.
One way to do this is by using a combination of guesswork and free tools like Google Trends which shows you the relative popularity of any search queries you enter.
Let’s say you have three topics from the previous step: Overcooked, Overcooked 2 and Mario Kart. Enter all three terms in Google Trends and it’ll show you which topic is the most popular.
Keep that list of ideas close, because we’re going to filter them so that only the contenders with the most potential remain.
Recap: you want to write about things that people are searching for month after month in order to drive long‐term traffic to your website.
One way to do this is by using a combination of guesswork and free tools like Google Trends which shows you the relative popularity of any search queries you enter.
Let’s say you have three topics from the previous step: Overcooked, Overcooked 2 and Mario Kart. Enter all three terms in Google Trends and it’ll show you which topic is the most popular.
 Mario Kart wins!
One drawback, though: while it’s great for tracking trends, what Google Trends doesn’t do is show the search volume of search queries.
So while “Mario Kart” is clearly the winner here, it could, in reality, get four searches a month while the other terms get one. In which case, none of them would be considered to be popular at all.
That’s where Ahrefs comes in.
Paste your topic or keyword into Ahrefs’ Keywords Explorer and scroll down to look at the SERP overview. From here, just check the column that tells you how much estimated monthly organic traffic the top‐ranking pages have.
Mario Kart wins!
One drawback, though: while it’s great for tracking trends, what Google Trends doesn’t do is show the search volume of search queries.
So while “Mario Kart” is clearly the winner here, it could, in reality, get four searches a month while the other terms get one. In which case, none of them would be considered to be popular at all.
That’s where Ahrefs comes in.
Paste your topic or keyword into Ahrefs’ Keywords Explorer and scroll down to look at the SERP overview. From here, just check the column that tells you how much estimated monthly organic traffic the top‐ranking pages have.

Estimated traffic for top US results in Google for “Mario Kart”
PRO TIP
Now that we’re left with a handful of ideal topics, it’s time to check for two crucial things that can hold your blog post back from ranking: competition & intent.
Let’s start with competition. Head to Ahrefs’ Keywords Explorer and enter your topic.
Check the Keyword Difficulty metric, which gives you an estimate of how hard it would be to rank in the top 10 Google search results.
If you’re blogging for a brand or business, make sure to check for business potential.
This means only selecting ideas that are related to your niche and that might convert a reader into a customer somewhere down the line.
For example, if you’re selling graphic design software, a blog post about “how to make an infographic” makes perfect sense. Conversely, a post about “how to change a car tire”, no matter how much traffic potential it has, is unlikely to bring about results for your business.

Keyword Difficulty for “how to make a dungeons and dragons character”

SERP overview for “Mario Kart”
Editor’s note

Here’s what your outline might look like:
Not sure what to write about? Use Ahrefs’ Content Gap tool to get some inspiration.
For example, let’s say that we wanted to write a review of the Nintendo Switch. We could paste in a few of the top‐ranking pages for “nintendo switch review,” then hit “Show keywords” to see the other keywords for which those pages rank.
Looking through this list, I see things like:
- nintendo switch durability
- nintendo switch number of players
- nintendo switch screen quality
- nintendo switch build quality
- Header: Nintendo Switch Review: It’s Amazing!
- Subheader: Why is the Nintendo Switch so amazing?
- Sub‐sub‐header: Great selection of games
- Sub‐sub‐header: Durability and screen quality
- Sub‐sub‐header: Number of players
- Subheader: The best games on Nintendo Switch
- Sub‐sub‐header: Solo play games
- Sub‐sub‐header: Cooperative games
- Subheader: Why is the Nintendo Switch so amazing?
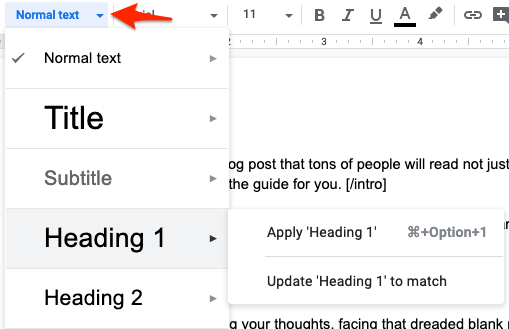 In HTML formatting, this is what the previous structure looks like while using header tags:
- <h1> Nintendo Switch Review: It’s Amazing! </h1>
- <h2> Why is the Nintendo Switch so amazing? </h2>
- <h3> Great selection of games </h3>
- <h3> Durability and screen quality </h3>
- <h3> Number of players </h3>
- <h2> The best games on Nintendo Switch </h2>
- <h3> Solo play games </h3>
- <h3> Cooperative games </h3>
- <h2> Why is the Nintendo Switch so amazing? </h2>
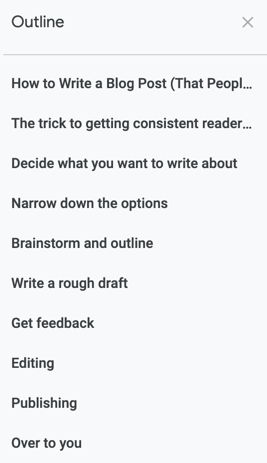 Clicking on each heading jumps you right to the corresponding section in the draft itself.
Super handy, and great for organizing your post.
Clicking on each heading jumps you right to the corresponding section in the draft itself.
Super handy, and great for organizing your post.
pro tip
Once your outline is in place, it’s time to flesh that skeleton out into a rough draft.
Use your headers as a guide and write your first draft. This stage is all about “getting it out”, which means doing your best to avoid any form of interruptions to your writing.
In other words, don’t self‐censor as you go along. Don’t repeatedly re‐arrange your outline to make things flow better, and definitely don’t rewrite the same sentence ten times just because it “doesn’t read quite right”.
I know, it’s far easier said than done—I just rewrote that paragraph above three times myself.
Still, try to minimize interruptions and keep going. Think of it this way: it’s pretty much impossible to write a perfect first draft, so don’t beat yourself up over it.
There’s lots of time to edit for perfection later on—this stage is about getting everything down on paper (or screen) so that you have something tangible to work with.
You can also use digital tools like Workflowy to map out your ideas—it helps you to organize hundreds of notes in a format that is searchable, expandable and collapsible for easy structuring.
pro tip
Once your draft is written, look it over and fix all glaring mistakes. For example, if it’s suddenly absurdly clear that section B should come before section A, go ahead and re‐order those sections.
Also be sure to fix issues like grammar and awkward sentence construction as you go along. A quick way to do this is to use a tool like Grammarly, which allows you to check your writing for mistakes.
Prone to getting distracted by things like tabs and messages? Try using a tool like Ommwriter to remove noise from your writing environment.
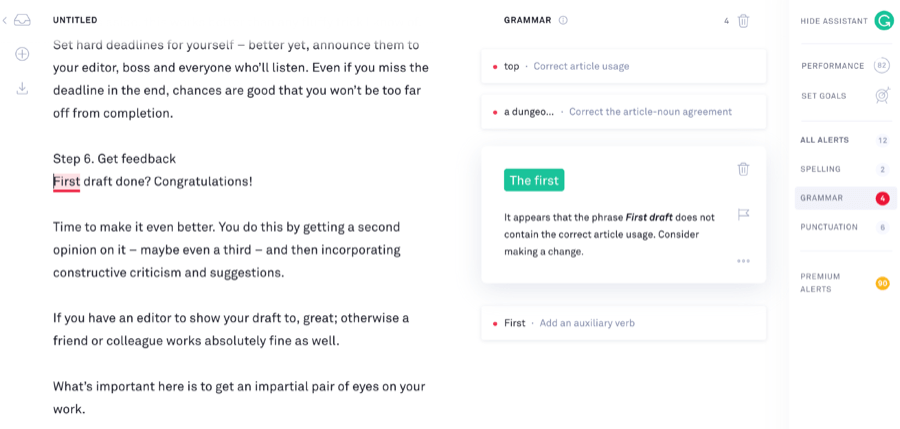
Grammarly’s review of this blog post
pro tip
First draft done? Congratulations!
Time to make it even better. You do this by getting a second opinion on it—maybe even a third—and then incorporating constructive criticism and suggestions.
If you have an editor to show your draft to, great; otherwise a friend or colleague works absolutely fine as well.
What’s important here is to get an impartial pair of eyes on your work.
Chances are that a third party will be able to point out things like logical loopholes and poor flow that you wouldn’t be able to spot on your own. They might even mention that too much industry jargon is making your post difficult to understand, for example.
Writing just not flowing and you’re stuck staring at a blank document for days on end? Here’s a fail‐proof trick that works for every writer I know: it’s called a deadline.
Nothing quite like the fear of losing your job or letting someone down to get those writing juices flowing!
All jokes aside, this works better than any fluffy trick I know of. Set hard deadlines for yourself—better yet, announce them to your editor, boss and everyone who’ll listen. Even if you miss the deadline in the end, chances are good that you won’t be too far off from completion.
The Ahrefs blog is definitely guilty of this at times!
pro tip
Formatting is all about making your post as easy as possible to digest—there’s a reason why memes and GIFs do better on the Internet than epic walls of texts.
Thankfully, there are ways to “cheat” this without resorting to rewriting entire chunks of your post.
Try:
Don’t let others’ opinions overpower your own. While it’s crucial to get different points of view and new ideas in order to strengthen your work, it’s still your work—not theirs.
It’s a fine balancing act, but it’s up to you to fight for what you believe in while also graciously accepting that there is always room for improvement. This can be difficult to do, especially if the person giving you feedback is someone you report to at work.
In these cases, I like to employ the rule “lose the battle, win the war”: pick and choose your fights carefully. Let smaller things go, but if something is of core importance, make it known.
- Including relevant images in your post to break up huge chunks of text (Remember to optimize them for SEO);
- Using headings effectively—we’ve covered this briefly, but headings help to “break down” a lengthy post and guide readers through what to expect from each section;
- Using bullets and lists like this one to provide information succinctly;
- Simplifying “big words”. Write how you would speak to a friend—so instead of saying “feasibility,” say “chance.” Tools like Hemingway help to analyze your copy and check if it can be easily understood.
pro tip
Now, we’re almost all set. At this point, your post should be rock‐solid and ready for upload to your content management system.
I’m recommending using WordPress (like 75,000,000 other websites out there) because it’s extremely customizable, easy to update and integrates well with many third‐party plugins and programs.
Case in point: if you’re using Google Docs, you can export your blog post to WordPress with a single click using Wordable. This will automatically export all formatting like header tags, bolded text and so on.
If you’re writing for a business, do a final read through and make sure that your post never feels like a hard sales pitch. Feel free to promote your brand where relevant, but do your best to provide alternatives and never shoehorn mentions or, even worse, promotional offers.
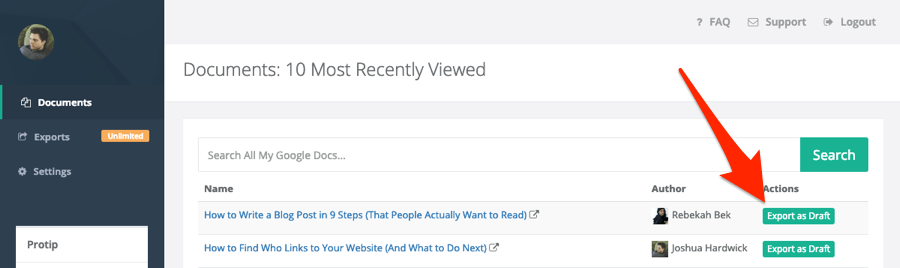
Easily export and format blog posts in WordPress from Google Docs with Wordable
- The 7 Best Areas in Zelda: BotW That Look Absolutely Incredible
- Awesome Areas in Zelda: BotW That You Never Knew Existed
 Once this is done, hit publish and voila!
You now have a blog post that screams “CLICK ME” in the search results.
Recommended reading: How to Craft the Perfect SEO Title Tag (Our 4‐Step Process)
Once this is done, hit publish and voila!
You now have a blog post that screams “CLICK ME” in the search results.
Recommended reading: How to Craft the Perfect SEO Title Tag (Our 4‐Step Process)
No comments:
Post a Comment